At that time, my family of 5 was living in a 3-bedroom, 1-bathroom, 16-foot wide mobile home, with no basement and no garage.
To make our space troubles worse, my husband was using our storage/mudroom as his home office. Isn't he handsome?
It was great to have him home, but I was literally running out of space to put things. HOWEVER, I felt it was important to be as prepared as possible for emergencies and hard times. Some of the things I worried about (living in Northern Alberta) were having to evacuate due to forest fires, or being without heat in the middle of the winter. So I felt we should invest in some decent sleeping bags which would be helpful in both situations (not to mention family camping fun!). The trouble was: sleeping bags take up room.
So, one day, I was actually wandering around the house, looking for possible places to store these new sleeping bags. I came to my daughters' room (they were sharing bunkbeds) and I stood staring at my 4 year old's bed.
In a lightbulb moment, I realized that she didn't take up all of her bed! She used maybe two-thirds of it when she stretched out. That meant there was space available! And I knew just how to use that space for our sleeping bags.
First thing I needed to do was measure the sleeping bags, first the round end, then the length of the two of them end to end:
The diameter of this circle was 11 inches.
The length of two bags end to end was 46 inches.
I found some fabric to match my daughter's comforter, and I cut out 2 shapes: One circle, and one large rectangle.
Sewing Instructions
(Sorry I don't have step-by-step pictures of me cutting and sewing.
Six years ago I had no idea I'd be sharing it on a blog today!)
Six years ago I had no idea I'd be sharing it on a blog today!)
Circle: Since the end of the sleeping bag was 11 inches across (diameter), and I wanted to add another inch to allow for a 1/2 inch seam all around, that made the diameter 12 inches. So I cut out a 12-inch circle.
Rectangle: Knowing what length to cut the rectangle fabric was easy because I already knew that the two bags end to end were 46 inches. I needed another 1/2 inch seam allowance for one end, and enough extra fabric on the other end to hem it and make about a 1-inch casing to later thread a drawstring cord through. That equalled a length of about 52 inches.
Now was a chance to use my Grade 7 Math skills: The width of the rectangular piece of fabric would be sewed to the circle, so I had to figure out the circumference of the circle. This was pi x diameter or 3.14 x 12 inches = 37.68 inches, rounded up to 38 inches.
So the rectangle I cut was 52" x 38".
Then I sewed one length of the rectangle to the other length of the rectangle with right sides together. Then I sewed (slowly to make the curves) the circle to one end of the rectangle to make a hollow cylinder. (Remember, all the seam allowances were 1/2 inch.)
Next, I hemmed the unfinished end, made a casing, and threaded the cord through it.
Then I stuffed the two sleeping bags down inside this cylindrical, draw-string bag and tied off the end nice and tight.
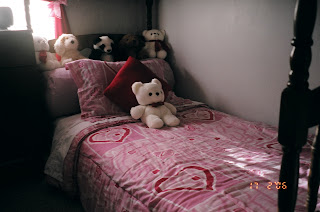
I put it on my daughter's bed like this:
It was a perfect place for her stuffed animals to sit!
She loved leaning against it when she read in bed at night.
I loved it because it was a great use of space. The only problem? Now my other daughter wanted one too. Good thing I had two more sleeping bags to find homes for!


What an ingenious creation - looks so cozy! Great idea!!!
ReplyDeleteBrilliant idea! You are a clever chick! Hope your week is going great! Angie xo
ReplyDeleteGreat idea Kathryn!
ReplyDelete