Saturday, 25 February 2012

Trendy Tissues

A few months ago, I mentioned on Facebook that I liked to coordinate my tissue boxes with the rooms they are in.  I thought this is what all people did.  Apparently not.  My friends wanted to see proof of my quirkiness so I took a few pictures:
You get the idea.

The problem with this habit is that sometimes - oh horror! - I can't find boxes to match the rooms!  Or I'll spend more on the tissue just because I want it to match, not because I like the brand or the price.

So I decided to make my own tissue box covers to coordinate with the rooms of my house.

I've made three so far, and I think they're really cute.  So do my kids.  My husband said:  "Wow.  That matches."

So, the first thing I did was find a larger size Kleenex box that I could use as a guide, knowing that if this box could fit under it, most other boxes would as well.  I traced it, planning to make my box about 1 cm bigger all round.
I used old poster paper that had faded in my sunroom and wouldn't be used for anything else.  There was enough paper for me to cut out patterns for 3 boxes.  When they were cut and folded, they looked like this:

Then I taped the ends to the main piece.
Next, I cut out the middle hole through which the tissues would be pulled.  I made this about 4 - 5 inches long and about an inch wide.  I used a knife to cut the hole:
Then I folded up the ends and taped all the sides together so it looked like this:
And the underside looked like this.  Very attractive so far, isn't it?
Now the fun part:  choosing coloured paper to cover the box with!  I wanted a box to match my living room carpet so I put paper next to it to see what colours looked best...
I decided to cover it in black (construction paper) then make coloured circles out of scrapbook paper.
First I cut out a piece to cover the top then cut out the center hole (cut the two short sides and one slice down the middle, then fold the two sides back).
Inside the box looks like this.  Folding the paper through the hole makes a nice clean edge.
And this is what the top looked like.  On subsequent boxes, I realized it was best to have a little overhang to glue down the sides of the boxes, so I cut little corners out like this:
Then I folded the paper along the edges of the cutout corners.
This was modpodged to the top and sides of the tissue box.  Then strips of paper were cut to appropriate widths and modpodged around the sides of the box.  Any decorations were added, then I modpodged over the whole thing.

Yay!  I now have a tissue box that matches my living room carpet!


Three boxes to match three different rooms:

Living Room

Girls' Room

Baby Boy's Room

I still want to do some for my bathrooms, and my older girls want to make some for their rooms.  I think it would be a great project for Spring Break.

Harder cardboard for the first layer might be better - like a flattened cereal box or something - just to make sure it holds its shape well.  Any cutouts or pictures or stickers can be used - even 3D decorations like silk flowers or ribbons could be glue-gunned on after the last layer of modpodge.

Now I can choose tissues based on price or softness...not on what the box looks like!

Monday, 20 February 2012

Small-Space Storage Solution (for Sleeping Bags)

Now that I've started this blog, I feel pressure to get a few more posts on here quick.  But I can't craft that fast!  So allow me to post an idea I had about 6 years ago.  (Don't worry, I usually have ideas more often than once every 6 years.)

At that time, my family of 5 was living in a 3-bedroom, 1-bathroom, 16-foot wide mobile home, with no basement and no garage.


To make our space troubles worse, my husband was using our storage/mudroom as his home office.  Isn't he handsome?


It was great to have him home, but I was literally running out of space to put things.  HOWEVER, I felt it was important to be as prepared as possible for emergencies and hard times.  Some of the things I worried about (living in Northern Alberta) were having to evacuate due to forest fires, or being without heat in the middle of the winter.  So I felt we should invest in some decent sleeping bags which would be helpful in both situations (not to mention family camping fun!).  The trouble was:  sleeping bags take up room.

So, one day, I was actually wandering around the house, looking for possible places to store these new sleeping bags.  I came to my daughters' room (they were sharing bunkbeds) and I stood staring at my 4 year old's bed.


In a lightbulb moment, I realized that she didn't take up all of her bed!  She used maybe two-thirds of it when she stretched out.  That meant there was space available!  And I knew just how to use that space for our sleeping bags.

First thing I needed to do was measure the sleeping bags, first the round end, then the length of the two of them end to end:

The diameter of this circle was 11 inches.


The length of two bags end to end was 46 inches.

I found some fabric to match my daughter's comforter, and I cut out 2 shapes:  One circle, and one large rectangle.

Sewing Instructions
(Sorry I don't have step-by-step pictures of me cutting and sewing.
Six years ago I had no idea I'd be sharing it on a blog today!)

Circle:  Since the end of the sleeping bag was 11 inches across (diameter), and I wanted to add another inch to allow for a 1/2 inch seam all around, that made the diameter 12 inches.  So I cut out a 12-inch circle.

Rectangle:  Knowing what length to cut the rectangle fabric was easy because I already knew that the two bags end to end were 46 inches.  I needed another 1/2 inch seam allowance for one end, and enough extra fabric on the other end to hem it and make about a 1-inch casing to later thread a drawstring cord through.  That equalled a length of about 52 inches.

Now was a chance to use my Grade 7 Math skills:  The width of the rectangular piece of fabric would be sewed to the circle, so I had to figure out the circumference of the circle.  This was pi x diameter or 3.14 x 12 inches = 37.68 inches, rounded up to 38 inches.

So the rectangle I cut was 52" x 38".

Then I sewed one length of the rectangle to the other length of the rectangle with right sides together.  Then I sewed (slowly to make the curves) the circle to one end of the rectangle to make a hollow cylinder.  (Remember, all the seam allowances were 1/2 inch.)

Next, I hemmed the unfinished end, made a casing, and threaded the cord through it.

Then I stuffed the two sleeping bags down inside this cylindrical, draw-string bag and tied off the end nice and tight.

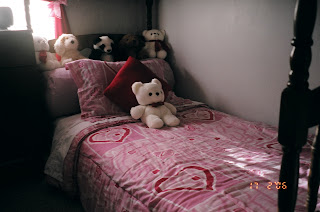
I put it on my daughter's bed like this:


It was a perfect place for her stuffed animals to sit!

She loved leaning against it when she read in bed at night.


I loved it because it was a great use of space.  The only problem?  Now my other daughter wanted one too.  Good thing I had two more sleeping bags to find homes for!

Sunday, 19 February 2012

Prayer Pillows

As a mother of young children, I am usually thrust headlong into my day with something urgent to take care of - a hungry baby, children to get off to school - you know, the usual.  Sometimes I'd make it halfway through my day before I realized I hadn't prayed yet.  I needed a reminder!  A sticky note on the mirror looked tacky and I was afraid that a prayer rock could be used as a weapon by one of my sweet children.


So, I decided to make some prayer pillows:


A friend of mine used her fancy machine to do the emboidery for me, but the writing could be done in other ways like crosstitch or iron-on fabric decals, etc.


I chose a size that would look good on my bed and be big enough to kneel on.


When I kneel on my pillow, I flip it over to the soft, fuzzy side so I don't put too much stress on the embroidery.


I wanted to make some of these for my sisters for Christmas, but finding fabric to match other people's bedrooms can be tricky.  So when they send me fabric, I will make one for them.  When I make them for my children, I might do a patchwork or log-cabin style, with smaller writing.  When I make more, I'll post pictures of them.


This is the poem I wrote to go along with the pillows: 


Did you finish your day
            And forgot to pray?
Here’s a gentle reminder
            That’s softer and kinder
Than a knock on the head
            As you lay down for bed
From an old prayer rock.

It works the same way
            Start and finish your day
With this soft, cozy cue
            Prompting you what to do.
So, now, if you please,
            Simply get on your knees
And start the day right.


In case this wasn't a good enough reminder, I asked my sister to make me a wall hanging.  You can see her many other crafts at http://www.yearningtocreate.blogspot.com/.  This is what she came up with for me:


I love it!  Now, when I walk into my room, I will remember to pray because this is what I see: